| |
Kitchen Remodel from
 |
|
|
Construction Index
Next Page—Finish
Day 87: Catching up
Day 76: Running water!
Day 75: Ooh, lookie!
Day 68: Handled
Day 67: Surprise!
Day 65: Getting there
Day 63: Playing in mud
Day 62: Walled up
Day 61: Drywall begins
Day 60: Update
Day 51: Electrified!
Day 43: Plumbed!
Day 38: Framed!
Day 36: Beginning the closet
Day 33: Another wall!
Day 30: Look at that wall
Day 29: First framing
Day 28: Retooling
Day 27: Demo done!
Here's the first 26 days-- the demo phase
Home
|
Homeowners Nancy and Paul share their kitchen remodel nightmare...
Back Story
We didn't buy this house because it was a great place to live. To make a long story short, our first priority was a house large enough and laid out correctly to include our home business, separate from the living quarters. That meant many compromises on the "home" side. I wanted to remodel the kitchen from the get-go. If you look at the before photos, you'll certainly see why. It was only 10x10, with only about 10' of countertop (broken up in three sections), limited cabinets, a 6" deep sink, and a 24" wide range. The walls and cabinets were painted white with a latex flat finish paint. Who uses flat in a kitchen?! The floor was covered with white ceramic tile, and there were two awkward and nearly useless closets -- one in the kitchen, and one just outside of it.
Sadly, other major repairs kept getting in the way. Any budget for remodeling the kitchen was disappearing and it went way down the to-do list. That is until the last straw. My husband, Paul, went to slide the range out so he could adjust the level, but it wouldn't budge. After one very big yank, it finally came out and the problem was clear. The former owner had, for some bizarre reason, run the waste line from the sink above the floor (under the cabinet toe kicks), to where it drops down under the range. To fit the range over that pipe, they'd cut a hole on the side of it! That was it. We needed to resolve this bizarre plumbing and that was going to require destroying most of the base cabinets (these weren't modular cabinets like you see today; they were built in place and it would be nearly impossible to "gently" remove them. And if that's the case, we might as well do the whole thing. Due to budget constraints, we'll be doing most of the work ourselves and making many compromises in product choices along the way.  TOP TOP |
Click thumbnails for a larger view.
Kitchen Before Montage

Floorplan Before

|
Photos:
• We made a bit of a mess today. You should have seen it before we cleaned up all the insulation.
• Here's the insulation we managed to salvage. Yes, there's some in that last bag.
• The largest ceiling opening is covered with drywall.
• A view of where the final wall was -- a portion of the hole where the header was is temporarily patched with a piece of salvaged lumber and some cardboard. What can I say; we were getting tired and the other piece of drywall was a bear to put up! |
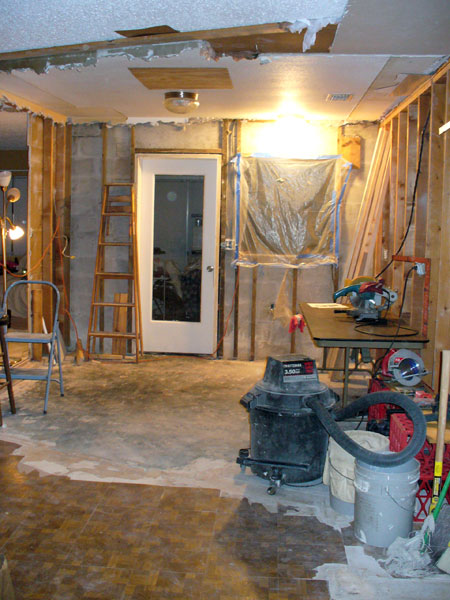
Day 27: Demo done!
July 28, 2007: Yes! Yes! Yes! The last of the unneeded studs, headers, and footers are gone! We held our breath a bit as those temporary 2x4s were removed from the final header. But as you can see, the ceiling didn't collapse. All that sweating Paul did up in the attic worked! On the downside, we had to pull down the ceiling from the two former closets and we both ended up covered in insulation. We managed to salvage most of it. Now the only thing left to demo is a small amount of wall board up at the ceiling along two walls, and remove some ceiling for the new headers we have to put up (the floating wall in front of the concrete northern wall, as well as the new closet). Removing the wall board at the ceiling is a bear because of the embedded "chicken wire" support in all the right angles. While Paul was doing some of that tonight, I was cutting some of those miniature railroad spikes from the old footers.
You'll notice in the first end of the day photo one of the two ceiling fixtures isn't lit. To remove that last header we had to disconnect the switch controlling that light, so we won't have it any more. It pays to be married to a former electrician! He's had to do all sorts of things like that, and he's still got to run all the new wiring.
The last thing we did before cleaning up was patching the ceiling. The old ceilings are just over 3/4 inches thick. For now Paul used some 1/2 drywall to close up the largest area (where we had to pull down the ceiling from the former closets). That was a total bear! The opening wasn't square and trying to get the drywall to fit took some trial-and-error, mixed with a little brute force. The rest of it was even more awkward, so a portion was temporarily patched with cardboard, and the long skinny section (from the old header) was covered with a 1x6 that was salvaged from the demo debris. A plastic bag filled the small gap left between the board and the drywall. TOP
|
End of Day 27


|
Photos:
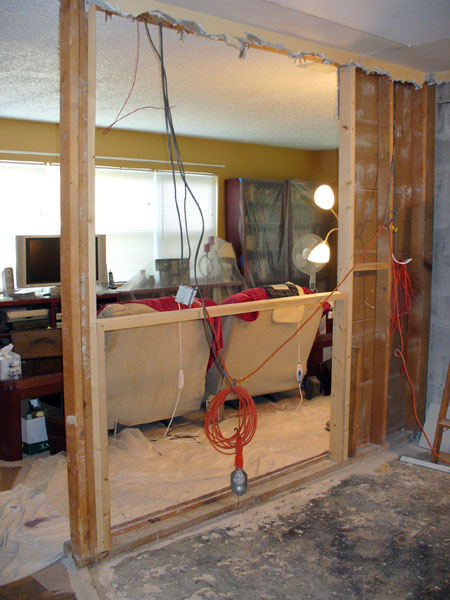
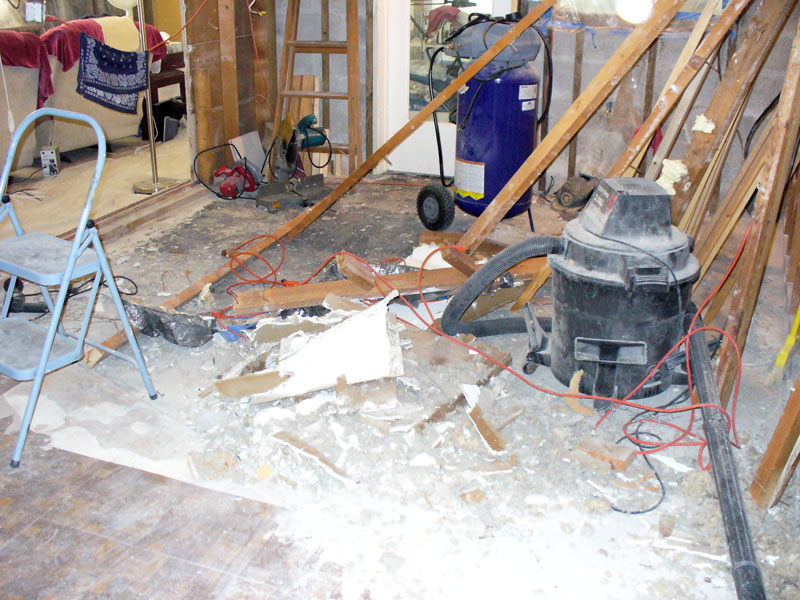
• This is a view of the kitchen from the front door. Where you see some tiles missing from the lower right is approximately where the new closet will be.
• This is a view from the corner between the dining room (where our pool table is) and the living room. The studs you see left of center front are remaining and another will be sistered to them. These are a necessary structural support, so our peninsula is more like a giant pass-through window.
• This is a view from the living room. The structural studs are now to the right. That little bit of wall on the left is remaining and expanding just a little, but between it and the column will be lower cabinets and 18" uppers. The rest will be open.
• Here's the tool staging opening. As you can see, some things are still covered in dust -- it's like volcanic ash! |
Day 28: Retooling
July 29, 2007: We didn't do too much today. Sunday's become our day to get a bunch of household chores done, and that doesn't leave much time for work. The main thing we did was clean up and prepare for the next phase. Paul's tools were all over the place. Our pool table was covered in stuff. We had a bunch of 2x4s from the demo leaning against a wall and piled on the floor that needed to be removed from the kitchen. Paul cut them down into manageable pieces for disposal. We put a tarp back down on the ground outside to hold what wallboard debris we had from yesterday along with the wood. All the tools were gathered up and put back in their proper place, including moving the compressor back out to the shed. We won't be needing it for a while. Then we set up a new work area. We brought in a folding table from the shed and set up the chop saw. Some plastic crates with a board across the top is acting as a staging area for some of the larger tools we'll be using.
Later this evening I was walking past the newly opened up wall and just stopped to look for a minute. It looks so much better already. Even envisioning where the new closet will be, having that wall gone makes such a huge difference. It's going to be great once it's done, but we're both very tired of living in a construction zone. We have furniture covered by plastic and drop cloths. Everything has a layer of powdered residue on it -- and I do mean everything. Although we worked hard to try to keep it under control, plenty still got into the A/C system and spread throughout the house. We're having to clean the A/C filter often. Once we're done with the construction, we've got a major clean-up job ahead of us! TOP
|
End of Day 28

|
Photos:
• You can see Paul's fine workmanship. He's so proud! If you look past the opening at our recliners, you can see the cords of our heating pads hanging down. What can I say -- we're both too old for this kind of work!
• Here's a view of the opening from the living room side. If you look very carefully to the right of the header piece, you can see where what is now the middle stud was cut. |
Day 29: First framing
July 30, 2007: The framing begins. First we sistered the isolated studs at the SW corner of the kitchen. Paul had cut about halfway into one of them during the demo stage -- it would probably have been fine, but better safe than sorry. After all it's supporting a pair of 2x12s that run out to the front of the house. Then we put in a new stud to end off the full wall at the other end. From there, we started on the lower portion and ran into a small hiccup. As we were leveling the header for this section, we discovered the floor's not level. We'd measured up from the floor on each side stud, screwed the header 2x4 on the right (north) side, but before screwing in the other side, we checked it with the level. Whoops! There was about a 5/8" difference from one side to the other. And of course, the side we'd screwed in was the lower one. We unscrewed it, set the left side first, then re-leveled it and screwed in the right. Some of that difference is due to the roughness of the floor, but even when we measured from the footer to the header for the other studs, there's a 1/4" difference.
So tonight we got in the two needed full-length studs for the western wall, a header for the lower portion and its jack stud supports, plus a blocking piece between the stud finishing off that full portion of the wall and its neighbor. We went ahead and marked and measured for the studs in the lower portion, so tomorrow I can start cutting those while Paul screws them in place. Then we can move to the upper portion. TOP |
End of Day 29
 |
Photos:
• Look at that fine pass-through window.
• The corners that need to be squared off. Interesting that the ceiling and floor portions don't match exactly... |
Day 30: Look at that wall
August 1, 2007: Okay, so we played hookie last night. Paul and I were both up late Monday night -- he didn't make it to bed until 3AM! We were both tired and took a nap Tuesday evening instead. Paul must have been exhausted -- I had to wake him when dinner was ready. Tonight we mostly finished the first wall. We put in the verticals in the lower portion, and totally built the upper. The only thing left on that wall, short of rerouting the electrical and drywall, is to put in another vertical over in the existing wall section (so we have something to attach new drywall to) and square off the footer and header at the other end. Because at that corner had another wall going off at an angle, those are sticking out a bit. TOP |
End of Day 30
 |
Photos:
• Here's the door we removed. It's a nice door; shame we don't have a use for it.
• Ah, look at that beautiful wall. The blue tape you see at the ceiling is to close off the little bit of a gap that was letting in a lot of heat. Paul use expanding foam along the back side. The only framing left to do is the closet. |
Day 33: Another wall!
August 6, 2007: No, you're not imagining things. I didn't do entries for the last two work periods. I wanted to wait until I had something better to show you. For this back (northern) wall, we built it just in front of the concrete block wall. We wanted the full depth of a normal wall. On Thursday night we removed the door and its frame, then got the footer in place. Paul finally got to use his new Ramset. He'd been waiting for an excuse to yell, "fire in the hole!" We normally close two of the cats in the family room at dinner because the other kitty eats a special diet (she's about 16 years old!). Unfortunately, with that door now gone, it was dicey. We tried leaning the door against the opening, but the other two figured out how to get around it. Before dinner time Friday we closed that opening with plastic. On Saturday we went by and saw our daughter's new house, stopped by the mall, then took in a movie ("The Bourne Ultimatum"). It was nice to take a break, but on the way home we stopped by Lowe's for more lumber. Sunday morning I helped our daughter get some furniture to her new house -- our pick-up makes that a lot easier. That afternoon we cleared away the ceiling where the header needed to go, put it up along with a second one, the installed the two end studs. We also realized we had to add a stud to each side wall to give something to nail drywall to at the corners. Tonight we got all the other verticals in place. Unfortunately one came down right where the old waste pipe is. While Paul was screwing in studs, I took a hacksaw to the copper pipe, cutting it back so it wasn't in the way. At this point, Paul can call the plumber to come and reroute the supply lines, and put in new supplies for the dishwasher and fridge. Tomorrow we can start on the closet. TOP |
End of Day 33
 |
Photos:
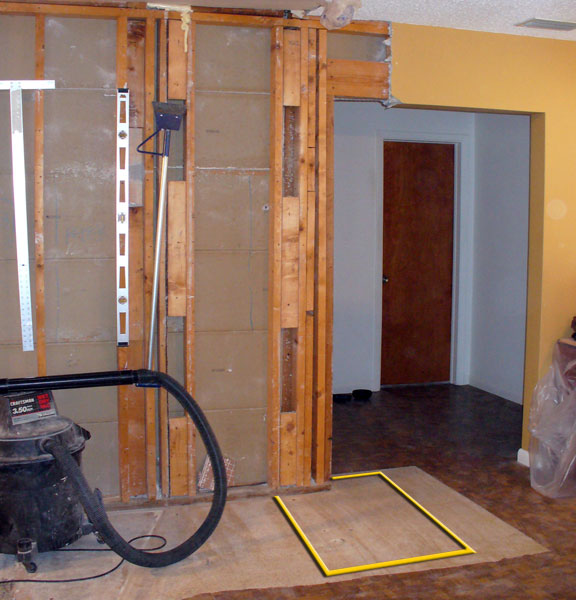
• This shot, taken from the front door (south), shows you how much things are shifting. The arrow on the left points to where the old closet ended. The one on the right points to where the new closet will be. It's about 18" closer to the front door, plus we're shifting its opening from the west side to the south.
• This photo was taken from the west side. The yellow lines are roughly where the new closet will be. It's a pretty small closet, but bigger than what we had before! |
Day 36: Beginning the closet
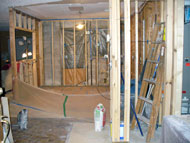
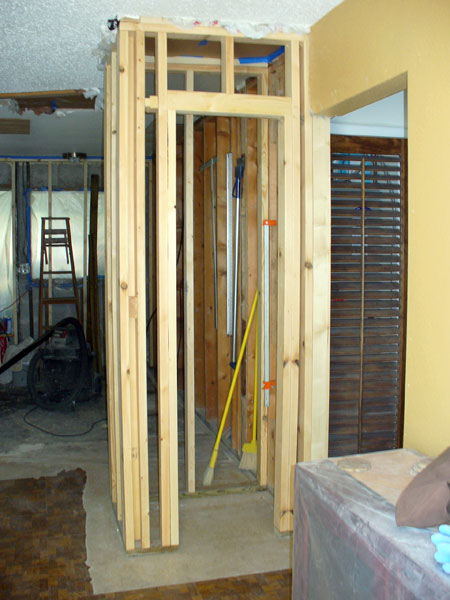
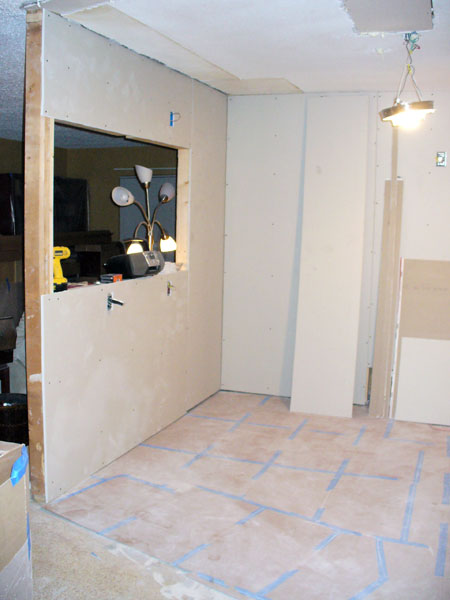
August 9, 2007: Yeah, I didn't do entries for the last two work periods again. There wasn't much to show. On 8/7 we mostly reorganized the work area to make room for the plumber, He's coming out on 8/13 to re-route the supply lines and run the extra lines for the other appliances. They're all going to be along that long wall where we had everything. We also discovered a problem with the estimated floor plan from Lowe's that caused us to rearrange things. We had to move the cabinet with the trash bin pull-out to between the dishwasher and fridge so the sink ended up in the correct position (where the existing waste pipe is located). We also realized the floor plan never included the closet we're now building (it's an addition). To make it all work, we're extending the eastern side by about 18". On 8/8 we worked on removing the floor tiles from where the new closet will be. That was a chore! We worked to remove all the adhesive, but still didn't get it all. Tonight we removed the wall board that was left on the side of the arch and about a foot from the top (since we're extending things). In this photo you can see it fairly well. That door you see beyond the arch is the main bathroom and our current water source for all things kitchen. When you realize the temporary kitchen is on the other side of that plastic "window" at the back of the kitchen, you get an idea of how far we have to trek--through the living room, the dining room, this little hallway... Oh, will I be glad when this is done! TOP |
End of Day 36
 |
Photos:
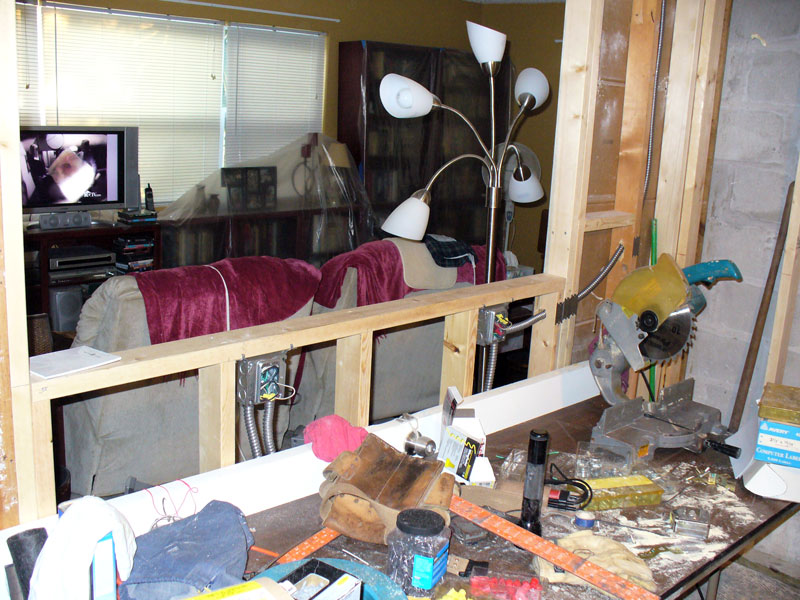
• Here's a view of the newly framed closet from the front door. Well, actually from outside... I had to get farther back to fit it all in.
• This is a view from the back of the kitchen. Yes, my house is a complete disaster! Ah, the joy of living in a construction zone -- plastic over most of your furniture, tools and material everywhere, and everything has a layer of powdery dust from the demo. |
Day 38: Framed!
August 12, 2007: Hey, only two days this time. And I'm very happy to report all the framing is now done! It was difficult at times, but the closet is framed. It's small, but we're not used to something being there, so it feels huge right now. Plus the former 48" opening leading to the bedrooms and main bathroom is now only 36". And with bags full of insulation and pieces of drywall at the end of the pool table, it's feeling a bit claustrophobic. Oh well, we need a coat closet and didn't want to make a small kitchen even smaller. The plumber comes tomorrow morning to rough everything. I'll be going to Lowe's later tomorrow to order the official measurements. Once those are done, we can finally order the cabinets themselves.
I went to Lowe's yesterday to finalize my appliance choices. All are stainless steel with stainless handles (I didn't really like the black handles -- it's a little more, but worth it). The fellow who's been working with me has been absolutely great. He managed to get them all for less than $3,000. That's a side-by-side fridge with ice on the door, a glass cooktop range, an over-the-range microwave/vent hood combo, and a dishwasher.
I think electrical work will be next. Unfortunately that means more attic time for Paul. After that will probably be patching the ceilings and putting up the drywall. Then we deal with the floor. All of that has to be done before the cabinets arrive approximately four weeks after ordering. The clock is ticking! TOP |
End of Day 38
 |
Photos:
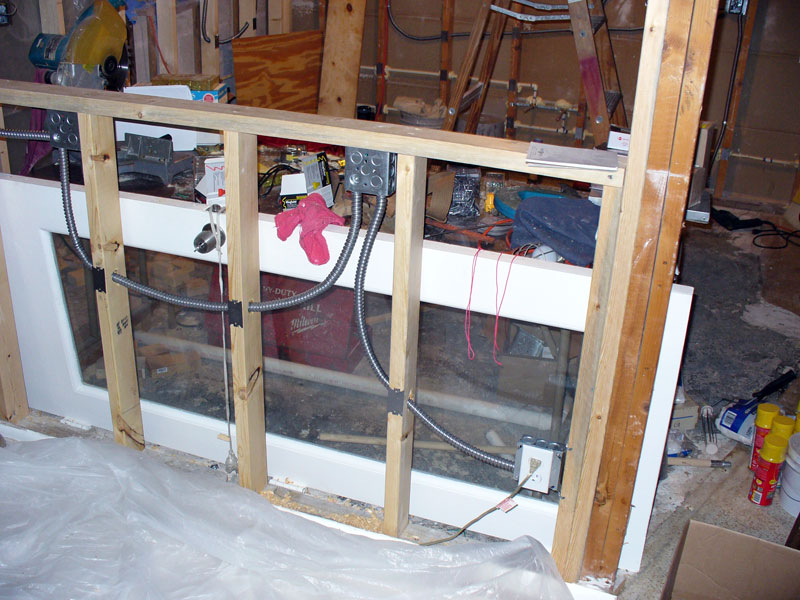
• Our plumber got the supply lines moved from the northern wall, to where they'll be needed on the eastern wall. That large box on the right is the 'faucet' for the fridge.
• This is our "end of day" photo. You can see most of the plumbing work as well as many of the outlet boxes I installed.
• Here are some of the many boxes I put in for outlets and switches. You can also see where we wrote on the wall what was going where (for the plumber).
• These are some of the outlets on the northern wall. You can also see where the water supply lines come out and go towards the other wall. |
Day 43: Plumbed!
August 19, 2007: We're taking today off. Yesterday, Day 43, was a killer for Paul, and I've been fighting a vicious headache for a couple of days. This evening we're going to our daughter's for an early celebration of Paul's birthday (actually Thursday).
On Monday, 8/13, our plumber was out to do the rough-in. With that floating wall shortening the length of the room slightly, we had to adjust our cabinet layout on the eastern (longest) wall. To keep the sink where the existing waste pipe was, we moved the 18" trash cabinet from left of the sink, to between the dishwasher and the fridge. On Wednesday, 8/15, we had our official measurements done. Yesterday morning I was back at Lowe's to order my cabinets, countertop, and appliances. Imagine writing a check for over $14,000!! At the beginning of this project, I said I wanted to get it done for between $15,000 and $20,000. Considering all the lumber and supplies we already bought, and the things I still have to get (flooring, faucet, garbage disposal, more lumber, etc.), looks like I called it pretty close.
The main project this week has been the electrical work. Paul spec'd the basic location of the various outlets to conform to code, then he had me decide on their final location. I put in all the boxes. I was a bit nervous at first--afraid I wouldn't do a good job; that they wouldn't be level. But once I got going, I was fine. I've asked him to show me how to wire the outlets, so I'm looking forward to doing that. Yesterday was the roughest day. Paul was up in the attic quite a bit. He ran flex from the kitchen to the laundry room (where the panel is). Then once he cut the seven wires, we had to try to get them through the flex. He pushed from the junction box in the attic while I pulled from the panel. Once we reached the end, we discovered only one of the wires made the full distance. Several feet before panel, the others came loose. Dang! So we had to pull them all back out, then re-tried from the other direction. This time, I pushed from the panel and Paul pulled from the attic. Success! Next, we go from the junction to the actual outlets and switches. TOP |
End of Day 43
 |
Photos:
• Paul is so happy he's almost done in the attic. You can't see all six junction boxes he had to put in. On top of the existing circuits, Paul ran three more.
• The east wall of the kitchen has the most going on. There are countertop outlet boxes as well ones for the fridge, garbage disposal, and dishwasher. Then there's the switches by the sink.
• Here's the northern wall with the microwave outlet up high.
• The bar wall was fun. Paul had to drill through three studs to get the flex from the full wall to the bar portion.
• On the living room side of the bar, Paul had to wire up a switched outlet for the floor lamp. No ceiling fixture in here.
• One of my favorite additions -- the light switches! |
Day 51: Electrified!
August 30, 2007: Okay, it's really been a long time since the last update. I wanted to wait until the electrical phase was done and that took longer than I expected. Now the only attic work left for Paul is to replace all that insulation. He took several photos of the attic wiring. Left out is the light fixture he put up there. He used the pull-chain fixture from the old triangular pantry closet and mounted it to a rafter near the temporary attic access.
(Note from Paul: You may notice most of the new electrical is using metal boxes and flexible aluminum conduit, instead of the more usual non-metallic "Romex" and plastic boxes. This is more time-consuming and expensive, but allows for changes to be made later, unlike Romex. Since almost no one uses this method of wiring anymore, it's hard to find all the parts and materials needed. But it's worth it from a quality standpoint. Also, you probably wouldn't notice that, instead of nails, screws have been used almost everywhere for fastening wood. Screws hold much tighter than nails.)
It's great to have a former electrician as your hubby! I got to play helper and learn a few things about wiring. You can see our temporary rig for the wire spools. It made it easier to cut multiple conductors at a time. Paul, naturally, did the vast majority of the work, but I got to do a few runs by myself. I learned how to connect flex to 4S boxes, strip wires, ground boxes, use jumpers when needed, make up boxes, and even testing lines. Paul wired up the switches for the kitchen and living room lights (that's them on the side of the closet). Yeah! No more walking all the way to the back of the kitchen to turn on/off the light, and no more having to go halfway into the living room and turning the switch on/off the floor lamp.
One morning Paul was out at a meeting, so I worked on removing some of the vinyl tiles out from the kitchen in the dining room. My hair dryer came in handy, but it's still hard work. I tried several things to remove the sticky mess left behind, but only Goof Off did the trick.
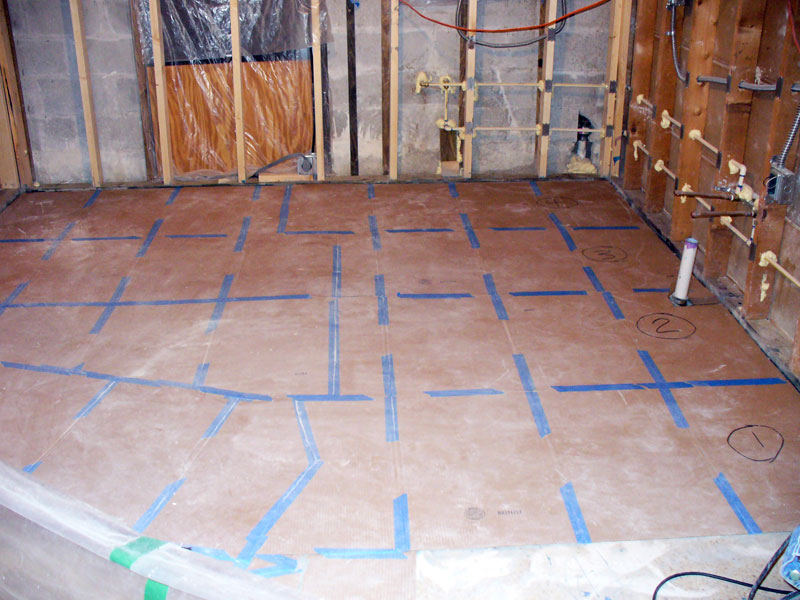
We had the kitchen A/C vent relocated so the cabinet door wouldn't hit it. We also did a moisture test on the concrete in the kitchen and, sure enough, there's a problem. So I ordered a roll-on moisture barrier and it arrived today. This weekend we'll apply the two coats required, then affix HardiBacker to bring up the floor level. We've also got to remove the last of the wallboard along the ceiling on two walls, patch the ceiling, put of the drywall, and if time, lay the vinyl tiles, all before the cabinets arrive in about two weeks!! TOP |
End of Day 51


|
Photos:
• Ooh, look at the HardiBacker all nicely laid down. The numbers helped us remember where they go.
• And with the primer for the concrete on them, you can still see the numbers.
• Paul's quite proud of his ceiling patches. Between the odd shapes and the thickness of the existing ceiling, they were quite the bear.
• I haven't taken photos of the floor after either pour -- it hasn't been pretty. But here it is all nicely protected by a layer of cardboard.
• The north wall of the kitchen. You'll see two blue boxes up fairly high -- they're for the undercabinet lights.
• Here's the long (east) wall. These are the only original studs and they're not even! Putting up drywall will be fun.
• And taken from just outside the front door, here's the whole space. You'll see one of the kitties (Gizmo) in the foreground. And see those two glowing dots midway up at the far left? They're Splattie's eyes! |
Day 60: Update
September 11, 2007: Yeah, I know. Where have I been? Without dramatic changes in the look of things, I just don't feel the need to take photos and update the page. So what's been happening since the last update? We had to re-organize our workspace again to be prepared to tackle the floor. And what a nightmare it's been! The moisture barrier went down fine. On Tuesday, 9/4, we cut and laid out the HardiBacker panels, then numbered them, so we'd know where they go. The next night we put them down with thin set.
On Thursday during the afternoon, I went out and rolled on the primer needed for the self-leveling cement. We poured it that evening, but guess what? It didn't do a good job of leveling. We mixed the Novaplan up per the instructions, but it was still pretty thick. It just didn't flow very well. When we checked it the next day, it was in pretty rough shape -- high spots, low spots, a mess! So we went out that afternoon and rented a professional grinder. I did a little grinding that evening, but Paul did the majority of it Saturday morning. Because we were still left with an uneven floor, we planned another pour, but scheduled it for Sunday evening (so it could set up during the day Monday). During the rest of the day Saturday, we put in the outlet boxes for the undercabinet lights. We'd been debating going with hard-wired lights or plug-in, and plug-in won. The outlets will be inside of cabinets, so the cords don't show. All those blue boxes up fairly high are for them.
We spent almost all day Sunday doing the ceiling patches. Where we removed the wall, the holes were all wacky. To make it easier to cut the drywall, Paul did it in sections. That evening, we re-primed the floor, had pizza for dinner, then went to do the second pour. A fellow in Lowe's flooring department suggested using six quarts instead of the five called for on the package. Well, that made it too watery!! Oh, what a mess. We kept adding more mix from a second bag, and finally just gave up and poured it anyway. Fingers crossed, we stopped for the night. Monday morning it was still wet, so I put a fan on the floor. Once it was dry, it wasn't too bad. There are still some depressions in need of fixing, plus some rough areas. Monday evening, I used a masonry sanding block to smooth out the edges all around the pour. We'll use Planipatch to fill the depressions and smooth things out.
Tonight, Paul put the insulation back up in the attic (lots fell as we removed the wall and closet) and patch his temporary access. He moved our work table and tools out of the area last night, and moved our recliners back to the bar wall tonight. Why, you ask? The cabinets are being delivered tomorrow!! Yes, we still have to fix the floor and lay tile. Yes, we still have to put up drywall. And no, we don't have a garage to store the boxes in. They'll have to go in the dining room, the living room, the kitchen (and be moved around so we can work), and perhaps in other rooms! We're getting there...TOP |
End of Day 60


|
Photos:
• Man, if only we were kids again. These boxes would make some great forts. The deliveryman was nice and didn't block the TV!
• And the boxes continue into the dining room. At least we didn't have to put some in the kitchen, too.
• Tonight's progress -- almost a complete wall. It went pretty well, so I hope we have all the walls up with mud and tape by the end of Sunday. |
Day 61: Drywall begins
September 13, 2007: We took off last night. The cabinets arrived in the morning. I locked up all three kitties in the family room for the delivery and we kept them there until we could wrap plastic around the lower portions after work. We have one male cat that, although fixed, has been known to mark vertical surfaces. (The photos were taken before putting up the plastic.)
Tonight, we started on the drywall. We got up the two full sheets that can fit on the back (north) wall, but had to do a piece on the west wall first (for spacing purposes). It went easier and quicker than we expected. There a ton of outlets that have to be cut out of the drywall. For that last panel on the north wall, we're going to cut it a bit short. That way the cords for the stove and refrigerator will still be able to be plugged into kitchen outlets. That spot is where the stove will go, so it won't be a problem for the cabinet installation. We'll just put in the other piece right before the new appliances are installed.
At 8:00 Saturday morning, the installer and the installation manager from Lowe's will be coming to inspect all the cabinets. They told us not to open them until then. My preliminary installation date is September 20-21. It will get firmed up on Saturday. We've got to have the walls fully up and primed and the floor tiled before then. The clock's ticking! TOP |
End of Day 61


|
Photos:
• Here's the north wall, but you can see some of the other two as well. That's Splatties coming to see me as I snap the shot. See that vertical 2x4 to the right in the shot. It's propping up a part of the original ceiling that's hanging too low. We still have to figure out how to best fix it.
• The long east wall. The ceiling slopes toward the opening (south side), and that created some problems.
• And the bar (west) wall. If you look carefully you can see the area that still needs drywall. |
Day 62: Walled up
September 15, 2007: Yesterday, we went to Lowe's for another expensive supply run. This time we picked up almost all the flooring (I'll have to go to another to get the remaining five boxes), along with a bunch of other things, including the balance of the handles (I'd already bought out the inventory of two other Lowe's and still needed four). Today was our pre-con appointment. That went fine. They didn't find anything wrong with the cabinets and the installer re-verified our layout. Unfortunately, he un-boxed everything and broke down some of the cardboard. Because we don't want problems caused by the cats, we had to put all the cardboard tops back on each cabinet, and drape cardboard around the ones in the dining room, so they don't get damaged while we're working. In the end of the day photo, you can see the side of a cabinet. After that, we went back to the drywall. There were a few problems, but the interior of the kitchen is mostly done. There's just a strip on the column by the bar that still needs drywall, then we need to go ahead and do the south side of that whole column. We're just worrying about the interior for now. Our official installation date is September 21-22. The installer will be here to start work at 8:00am Friday. It will be tight, but we should be ready. Lowe's installation manager said he'd arrange for our appliances to be delivered on Monday, 9/24. They'll come out to measure for the countertops that day, too. TOP |
End of Day 62
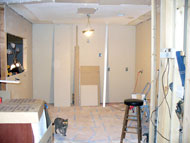 |
Photo:
• In this shot, you can see the three walls. You can also see Paul mudded some the ceiling patches.
• This is looking into the north west corner and the bar window.
• And a different viewpoint, this one looking at the south east corner and the back of the new closet. |
Day 63: Playing in mud
September 16, 2007: Today's our three month anniversary... of the kitchen remodel. Yes, three months of living without a proper kitchen. Yeah! Sorry, I'm a bit punchy -- it's been a long weekend. As you can see in the photos, things are looking better. The joints are all taped and the first layer of mud applied. The inside corner along the ceiling line of east and west walls was a bear. Removing the old plaster on the walls left serious damage to the ceiling in those areas. We also still need to do the inside ceiling corner along the back of the closet.
Most has joint compound has been sanded. If I get up early enough, I'll finish it (the inside corners at the ceiling line, the ceiling patches, and the bar window area). We'll finish the final mudding throughout the kitchen tomorrow. That will still leave priming the walls, patching the floor, priming the floor, and laying the self-adhesive tiles. It all must be done by the end of Thursday night. Wish us luck. TOP |
End of Day 63
 |
Photos:
• Look at those pretty walls. Well, at least in the photo you can see the imperfections from our drywalling.
• Here's a better view of the floor. Splatties, of course, wanted to get into the picture. |
Day 65: Getting there
September 18, 2007: I didn't do an entry last night as the photo wouldn't have looked any different. I got up early both yesterday and today to do some of the sanding/mudding. Tonight we finished the sanding and painted the walls with a tinted primer. At some point after the cabinets are installed, I'll paint what areas still show with the final paint color (Buckskin Pony, the same as in the living and dining rooms). Most of the walls will be covered with either cabinets or backsplash, so there won't be much in the kitchen to paint.
After dinner we tackled the floor, patching various depressions left from our two self-leveling (right!) pours. After Paul cleaned up the tools, I realized I'd missed a small one. I'll probably fill that with grout. In the floor photo, those dark gray areas are the quickly drying patches. I'll check it out tomorrow. Hopefully we'll be able to put down the latex primer and lay the floor tiles in the kitchen. TOP |
End of Day 65
 |
Photos:
• This is the view of the eastern wall. You can see into the side of the soon-to-be closet. The fridge goes in the large opening.
• Here's the northern wall. The stove with microwave on top goes here.
• And the western wall with the oversized pass-through window.
• Tonight's big project--laying down the tile in the kitchen. We've taped around the exposed edges for now. |
Day 67: Surprise!
September 20, 2007: Last night we did a bit more patching on the floor, this time with a thinner mix and it turned out much better. From the back side of the northern wall (we haven't closed that up yet), Paul inserted some extra bracing for the microwave bracket. And we finished up the night by removing more of the old vinyl tile. A little after 10:00 this morning, I got a call from the installer asking if he could come and start the install today! I told him we still had to lay the floor and he said he'd just do the upper cabinets. So tonight's photo feature pretty dark cherry cabinets.
It's a good thing we work from home. That meant we were here for the installer, plus Paul ended up having to move one of our outlets. I'd made a mistake in positioning the one for the undercabinet light over the sink--I forgot it was a shorter cabinet. Duh! Paul moved it and patched the wall while the installer worked on the northern wall. He'll be back tomorrow to continue installing cabinets, then finish up on Saturday.
Tonight I sanded a few more places on the floor. After cleaning it, we rolled on the primer. After breaking for a quick dinner, the vinyl tiles went down fairly easily until the last one. It spans into the dining room and along the carpet threshold of the living room. We ended up pulling up the carpet there to avoid an impossible curving cut. Once this is all done, we'll have to get carpet guys in to fix the damage. TOP |
End of Day 67
 |
Photos:
• Here's looking at the long eastern wall. You can see where the refrigerator's going (it's been painted to match the living and dining rooms).
• This is the western wall with the bar opening. The appliance garage is going into that back corner.
• And this is a view due north, taking in most of the kitchen. That large opening dead ahead is the future home of the stove and microwave. |
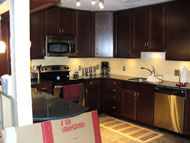
Day 68: Handled
September 23, 2007: Well, the cabinets are installed, and they all have nice brushed nickle handles. (I'm not a fan of knobs.) The installer finished the job yesterday. He'll still have to come out and install the appliance garage, but he has to wait until the countertop is in place. After he left, we made another supply run to Lowe's. It was raining, so we couldn't get the drywall we needed, but we got plenty of other things. Today I gave the area where the refrigerator is going a coat of paint, but it really needs another. Paul installed baseboard in the same area. We cleaned up the cardboard left over from the cabinets. Paul will take it to the dump tomorrow. We kept some pieces to protect the cabinets when we go to texture the ceiling. You'll see tape around cabinets around the bar opening. While the backsplash tiles will cover the area from the countertop to the bar top, the rest will need to be painted. Paul removed one of the glass doors from that end cabinet in preparation.
Tomorrow they'll come to measure for the countertop. plus we're expecting the appliances to arrive. We'll have to install stove and microwave. The plumber will be hooking up the dishwasher and refrigerator. TOP |
End of Day 68
 |
Photos:
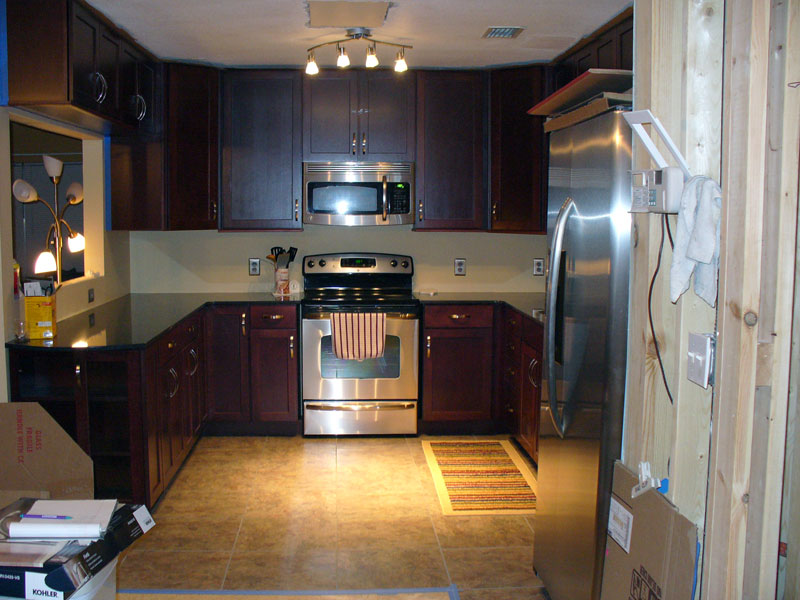
• Ooh, look at that pretty countertop. It sure beats the cardboard and plywood counters I've used for the past week!
• Here's a view straight into the kitchen. You can see the fridge on the right. That ceiling fixture is adjusted so it's out of the way of a patch that still needs finishing. It will run lengthwise when done.
• This is the long eastern wall. There's a pretty stainless undermount sink. I can't wait to have a functioning sink again! And a dishwasher, too!
• The bar wall -- a nice long run of unbroken countertop. The appliance garage will be in that back corner. |
Day 75: Ooh, lookie!
October 2, 2007: I held off on doing a new entry until the countertops were installed. Yes, that's right, it's a week after they measured and we now have countertops!! I was originally told to expect four weeks. When I spoke with the company to schedule the template, I was told it could be even longer as the countertop "color" (Eclipse Blue) wasn't a popular one. Then the afternoon after the template was made, they called and said it would be installed October 2. Wow! I had to run out and buy a faucet and garbage disposal.
Since my last entry, we installed all the appliances except the dishwasher. The fridge was easy to place, but it took awhile to remove all the various pieces of tape (throughout the inside, too!). The water dispenser and ice maker aren't functional yet. The plumber will take care of that on Thursday, along with the faucet, sink, garbage disposal, and dishwasher. The microwave took a full night! Getting the stove in and level was another chore -- the filler pieces the cabinet installer had in place on either side of that opening didn't leave enough room for the stove. We removed them and he'll have to trim them and put them back on when he comes out to install the appliance garage (should be next week). Once the appliances were in, Paul turned his attention to the undercabinet lights. He's still got most of them to go (you can see one dangling down in the countertop photo). When he didn't need my help, I was busy cutting shelf liner for all the shelves and drawers, then putting away food, dishes, etc. As of tonight, all my boxes are unpacked and put away.
I still have shopping to do. I need things like a new paper towel holder, utensil holder, a second rug, shelf organizers... there's quite a list. I've ordered the backsplash tiles, but they haven't shipped yet. We're getting there... TOP |
End of Day 75


|
Photos:
• I just took the one shot. You've already seen the dishwasher and fridge in earlier shots. Guess I could have taken one in the sink cabinet. Ed did a great job down there! If you look very closely at the countertop, by the faucet, you can see the seam where the two pieces were joined. That's one of the advantages of quartz over granite -- seams are much less noticeable. That and no maintenance leads me to recommend quartz over granite any day. |
Day 76: Running water!
October 4, 2007: Only one photo, but it's included because it's so special... running water! After three and half months without a functioning kitchen, it was what I missed most. I got used to having a very limited amount of surface space, and having no semblance of a work triangle. I even worked out using a gallon jug of water for the many times you need a little for cooking (instead of shlepping all the way to the bathroom for a cup of water). But what was the most irritating was not being able to quickly rinse my hands, a utensil, etc. A container of Wet Ones was the work-around, but I really missed running water. Not any more!!
The plumber was here and did a great job (Harris Plumbing -- I highly recommend him). He plumbed the sink and hooked up the faucet, garbage disposal, dishwasher, and refrigerator. I can now get chilled water from the door of the fridge, and it's been making its first batch of ice (we have to throw that one out, though). At this stage, I have a fully functional kitchen. There's still work to be done in there (the ceiling, bar top, backsplash, and lights over the bar), and plenty outside the kitchen (drywall, closet inside and out, flooring, and massive cleaning and re-organizing our work room and the family room). TOP |
End of Day 76
 |
Photos:
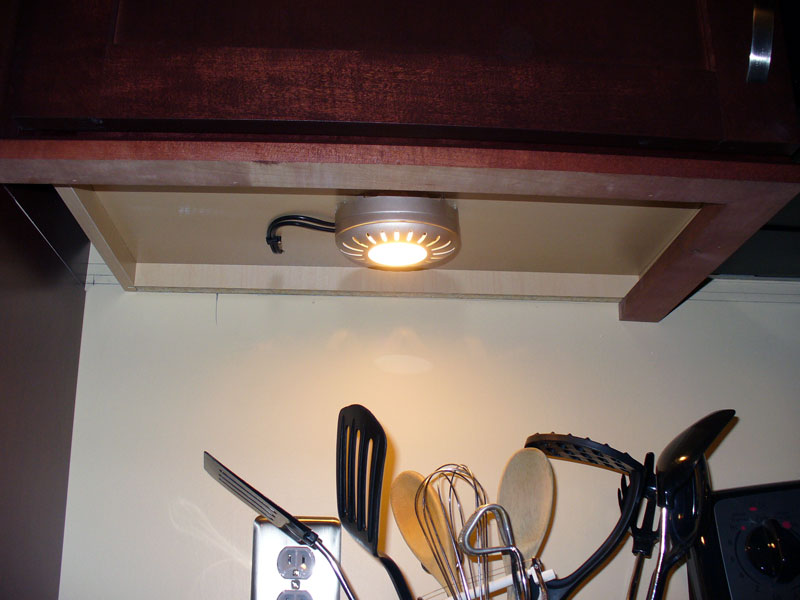
• Paul did a great job on the undercabinet lights. They really help light up the place. Here's one of them. Each cabinet bay has one of these.
• The pendants turned out great. This photo has a close up of a pendant with the light out to help you see the detail.
• My daughter's favorite thing in the new kitchen -- the appliance garage. We still need to add some trip to hide the seam. This is a combo image showing it closed and open.
• I love my Super Susan! It makes it so easy to get to all my pots and pans. I moved the lower shelf so you can get an idea of how it works.
• Here's a shot looking straight into the kitchen with all the undercabinet lighting on. The kitty in the forefront is Gizmo on his favorite throne!
• And a view looking northeast. By the way, those boxes on the bar ledge (far left) are the back splash tiles. |
Day 87: Catching up
October 21, 2007: I know... long time, no update. Sorry, there just hasn't been anything as exciting as running water! Plus, we're not killing ourselves any more. I made Paul his promised dessert. I'd told him I'd make a chocolate cheesecake as soon as the kitchen was functional, but he preferred a spice cake. I'll do the cheesecake on our fast-approaching 20th anniversary. Since I last updated the site, Paul finished installing the undercabinet lights. They gave him a fit for a bit. They kept not working. Turned out the T-connectors for joining multiple lights weren't making good connections. Once those were handled, he had to figure out the best way to install the pendants over the bar. The original plan was for putting the same undercabinet lights there, but I thought it would be better to have the light closer to the countertop. He did a great job. I originally bought some golden colored shades, but after putting them out, the shades limited the light. Thankfully Lowe's had a white version. Those put out a lot of light.
The cabinet installer came back to install the appliance garage and take care of a couple of other things left over from the initial install. We had our daughter and her family over for dinner last weekend, so they got to see the kitchen in person for the first time. Jenn's favorite things were the appliance garage and the Super Susan cabinet below it. They're favorites of mine as well. The appliance garage holds my blender, crock pot, and toaster. This way they're convenient, but out of sight when not in use. I could fit more in there, but that's enough. Because we use the coffee pot (to make tea) so frequently, it didn't make sense to put it in the garage as well. Instead, I bought a nice-looking new one. All the canisters sitting next to it hold different types of tea as well as our Sweet-n-Low and saccharin. What can I say... neither of us likes coffee, but we drink a lot of tea!
Most recently, our attention has been turned to the closet. Paul put up drywall for the ceiling, and he had to create a new door jamb to fit the old door and install it. Then he put up most of the interior walls (luan to take up minimal space) as well as the interior baseboard. We need to go get another piece of luan to finish the inside, then put in all the rest of the interior trim (at the inside corners and around the ceiling). I think from there we'll move to drywalling the exterior of the closet, finish mudding the ceiling, and drywall a portion of the living room side of the bar, as well as do some more work on the kitchen side of that opening. I've also got to stain and finish the new bar top as soon as we can get a final measurement. It will be stained a dark cherry like our living room furniture. TOP |
End of Day 87


|
| |
Next > |
|
| |
|
|
| |
|
|


